Getting Started
Get up and running with MCP Anywhere in a few simple steps.
Prerequisites
- Python 3.11 or higher
- Docker Desktop (for running MCP servers)
- An Anthropic API key for Claude AI (for auto-configuration)
Installation
1. Clone and Install
# Clone repository
git clone https://github.com/locomotive-agency/mcp-anywhere.git
cd mcp-anywhere

# Install with uv (recommended)
uv sync

# Or install with pip
pip install -e .
2. Configure Environment
Edit .env with your configuration:
# Required
SECRET_KEY=your-secure-random-key-here
JWT_SECRET_KEY=your-secure-random-key-here
ANTHROPIC_API_KEY=your-anthropic-api-key-here

# Optional
WEB_PORT=8000
LOG_LEVEL=INFO
Generate secure keys:
3. Start MCP Anywhere
If using uv:
# Start HTTP server (includes web UI)
uv run mcp-anywhere serve http

# Or start STDIO server (for local Claude Desktop)
uv run mcp-anywhere serve stdio
Otherwise, activate your venv first:
# Activate venv
source .venv/bin/activate

# Start HTTP server (includes web UI)
mcp-anywhere serve http

# Or start STDIO server (for local Claude Desktop)
mcp-anywhere serve stdio
The web interface will be available at http://localhost:8000
Adding Your First MCP Server
Step-by-Step Server Setup
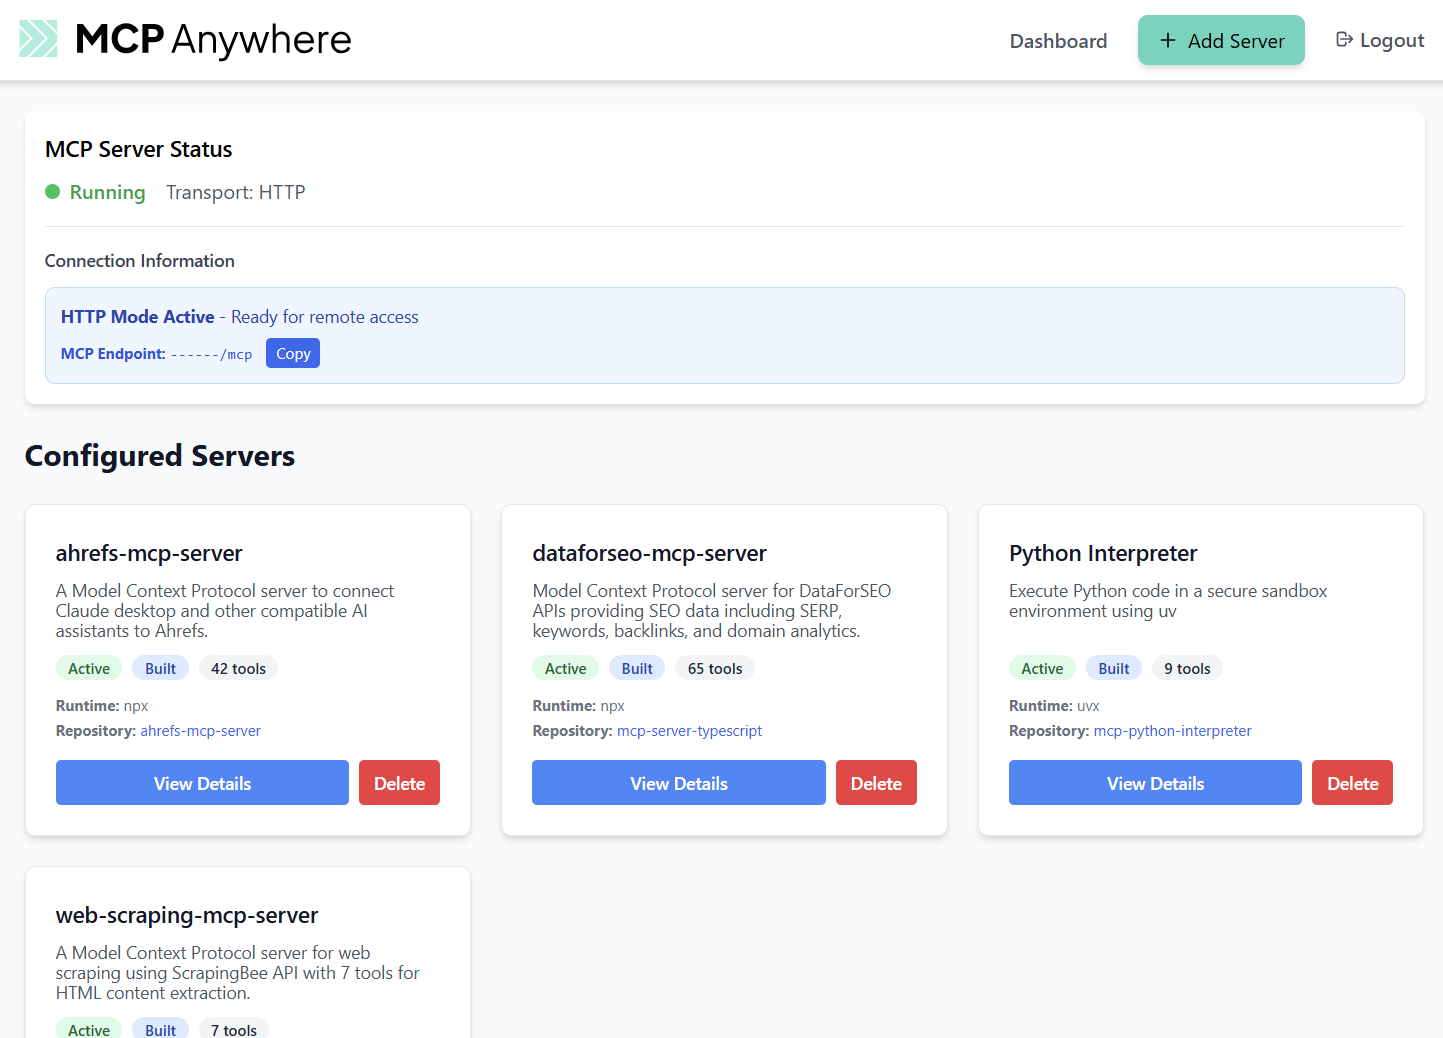
Step 1: Access the Dashboard
Open http://localhost:8000 in your browser. You'll see the MCP Anywhere homescreen:
Step 2: Add a New Server
Click "Add Server" in the top right corner to begin adding an MCP server.
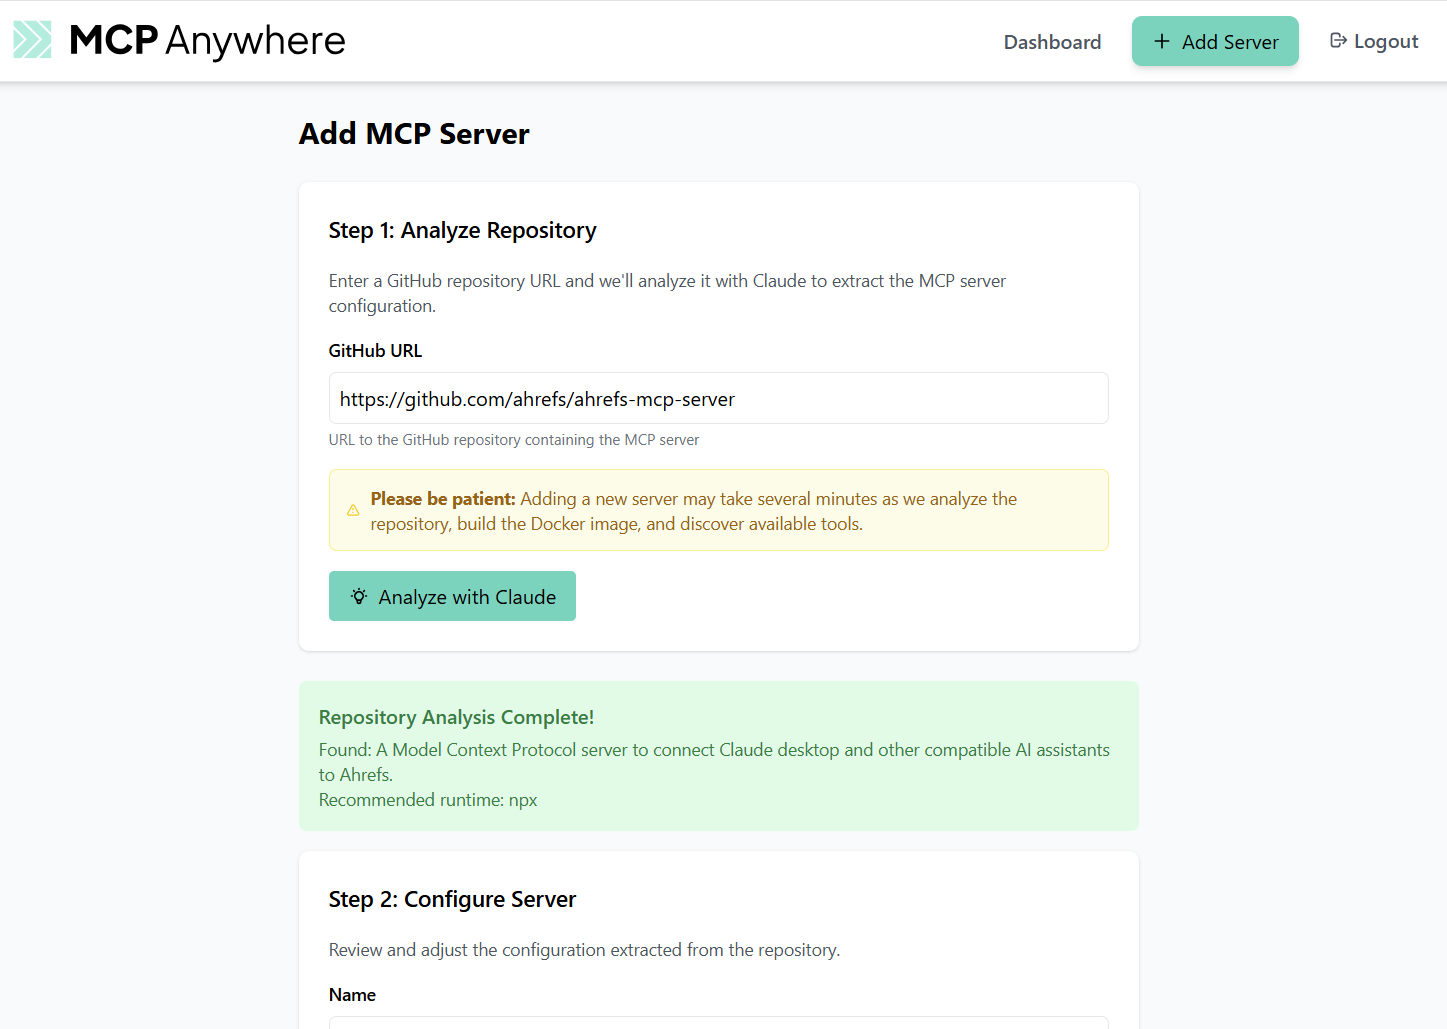
Step 3: Configure the Server
Provide the GitHub URL of a public MCP server, for example:
MCP Anywhere uses Claude AI to analyze the GitHub repository and determine how the MCP server should be set up. It will automatically create and populate configuration fields for you.

Configuration Attributes:
- Name: Unique name for the server
- Description: Description of the MCP server and its capabilities
- Runtime Type: Choose from 3 options:
- Docker (recommended for security)
- npx (Node.js)
- uvx (Python)
- Install Commands: Command to install dependencies (leave empty if none)
- Start Command: Command to start the MCP server
- Environment Variables: Any API keys or configuration the server needs
As many fields as possible will be automatically populated by Claude's analysis.
Step 4: Complete Setup
Once you've reviewed the configuration, click "Add Server" at the bottom right. The server will be created, built, and added to your dashboard.
Managing Your Servers
Server Dashboard
Once added, servers appear on your homescreen showing:
- Server Status: Active/inactive status
- Available Tools: Number of tools provided by the server
- Configuration Details: Runtime type, GitHub URL, and other attributes
Detailed Server Management
Click on any server to view comprehensive details and manage its tools:
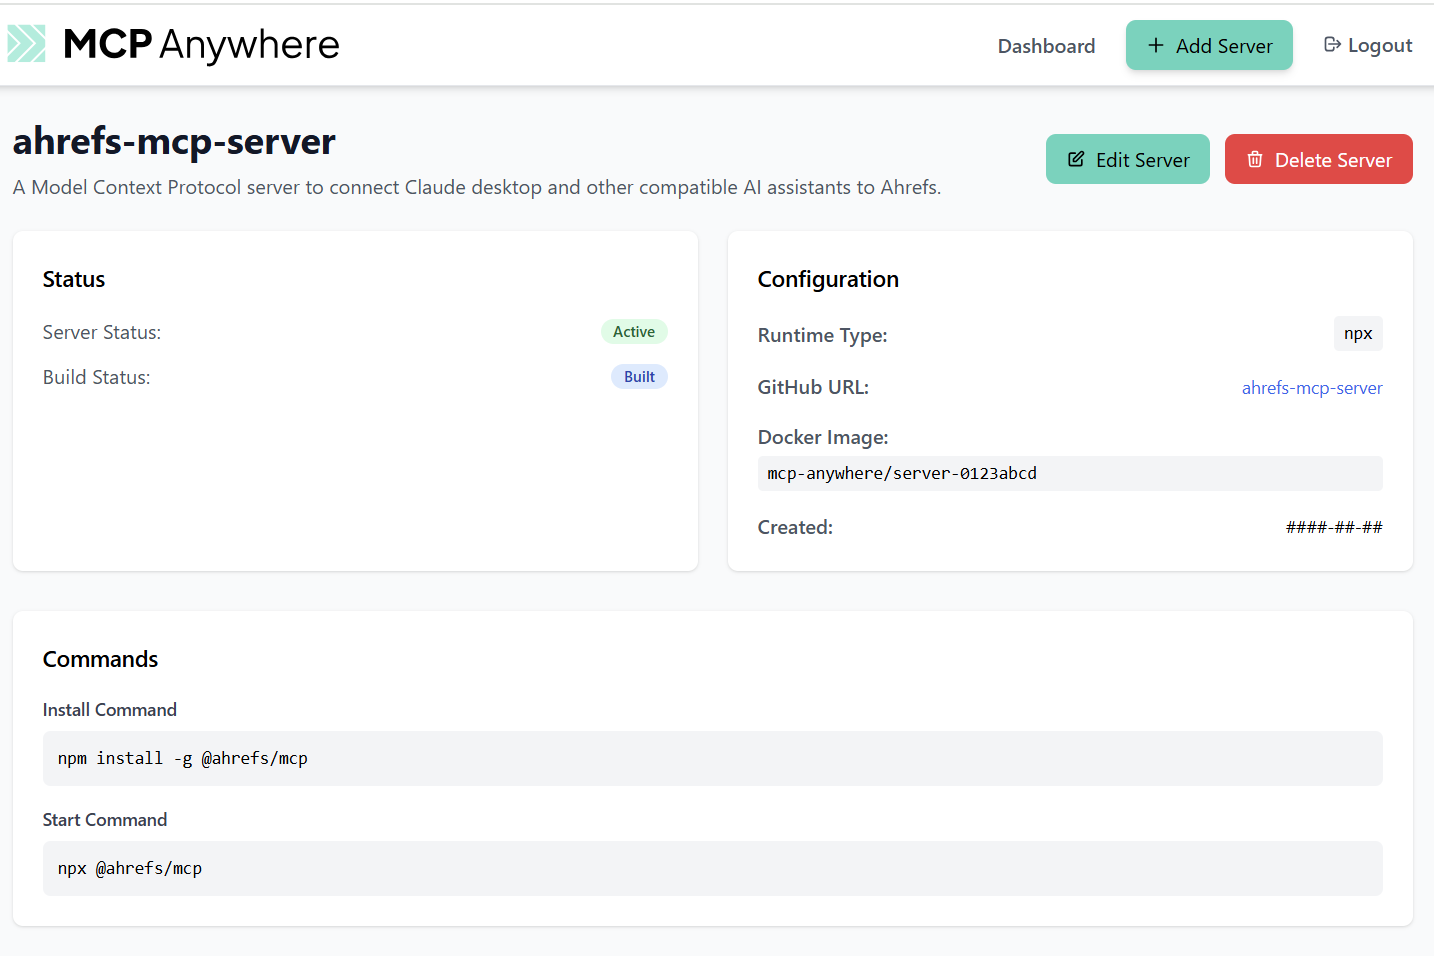
Status Information:
- Server Status: Current operational status
- Build Status: What step in the build process the server is in
Configuration Details:
- Runtime Type: Previously set runtime (Docker/npx/uvx)
- GitHub URL: Source repository
- Docker Image: Unique Docker image with suffix identifier
- Created Date: When the server was set up
Commands:
- Install Command: Dependency installation command
- Start Command: Server startup command
Environment Variables:
- All configured environment variables (keys hidden for security)
Secret Files:
- Uploaded credential files for secure container mounting
Tool Management
Available Tools Section shows each individual tool provided by the MCP server:
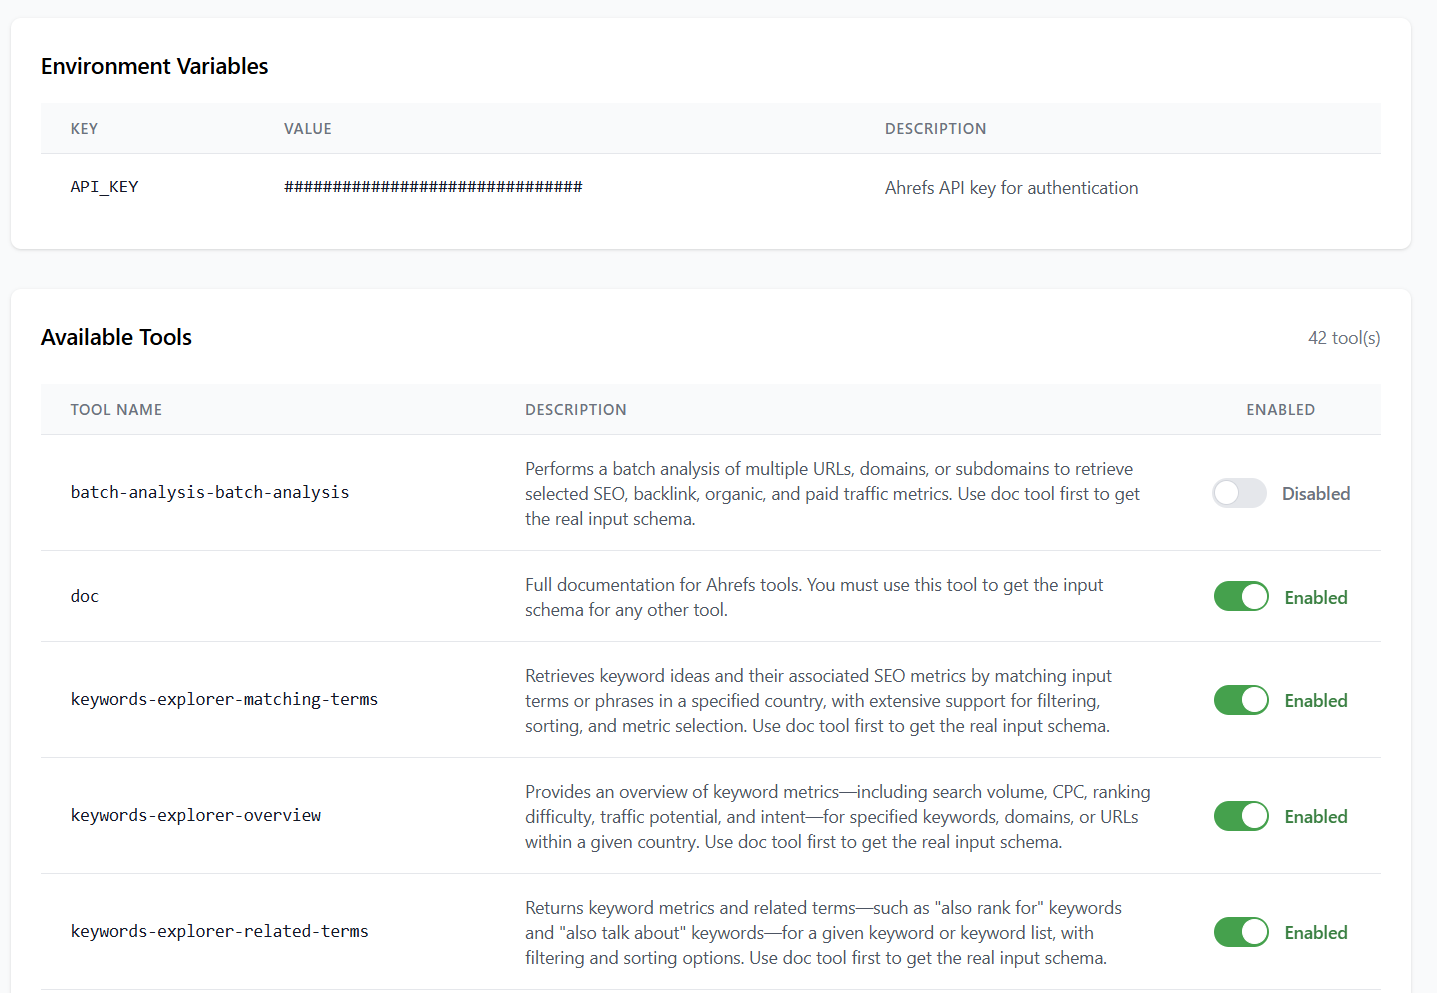
- Individual Control: Toggle each tool on/off independently
- Tool Prefixes: Each server gets a unique prefix (e.g.,
0123abcd) - Tool Naming: Tools are prefixed like
0123abcd_tool_nameto prevent conflicts
Secret File Management
MCP Anywhere supports secure upload and management of credential files for MCP servers that require file-based authentication.
Supported File Types
- JSON credential files (.json)
- PEM certificates and keys (.pem, .key, .crt, .cert)
- PKCS12/PFX certificates (.p12, .pfx)
- Java KeyStores (.jks, .keystore)
- Configuration files (.yaml, .yml, .xml, .txt)
Features
- Files encrypted at rest using AES-128 (Fernet)
- Maximum file size: 10MB
- Files mounted as read-only volumes in containers
- Environment variables automatically set with file paths
- Automatic cleanup when servers are deleted
Upload Process
- Navigate to the server detail page
- Use the "Upload Secret File" form
- Specify an environment variable name (e.g.,
GOOGLE_APPLICATION_CREDENTIALS) - Upload the credential file
- File automatically mounts when container starts
Security
- Files stored encrypted in
DATA_DIR/secrets/<server_id>/ - Each server has isolated secret storage
- Files only decrypted when mounting to containers
- Container access is read-only
Connecting Claude Desktop
1. Configure Claude Desktop
First run which uv, which will print out a path to the uv binary. For example on macOS:
You can then use that in the start command. Change the --directory path to your MCP Anywhere clone path.
Edit ~/Library/Application Support/Claude/claude_desktop_config.json:
2. Start MCP Anywhere
Run the following command from the MCP Anywhere project directory to start in stdio mode:
3. Restart Claude Desktop
- Quit Claude Desktop completely
- Restart the application
- Your MCP tools should now be available
4. Test Your Setup
In Claude Desktop, ask: "What MCP tools do I have available?"
Claude should list all enabled tools from your MCP servers with their unique prefixes.
Command Line Usage
MCP Anywhere provides several CLI commands:
Server Commands
# Start HTTP server with web UI
mcp-anywhere serve http

# Start STDIO server for Claude Desktop integration
mcp-anywhere serve stdio

# Custom host and port
mcp-anywhere serve http --host 0.0.0.0 --port 8080
Client Commands
Data Management
Troubleshooting
Common Issues
Docker not running:
- Start Docker Desktop
- Check with: docker info
Port already in use:
API key issues:
- Verify ANTHROPIC_API_KEY is set in .env
- Ensure your API key has available credits
Tools not showing in Claude Desktop:
- Restart Claude Desktop after configuration changes
- Verify MCP Anywhere is running: curl http://localhost:8000/health
Popular MCP Servers to Try
| Server | GitHub URL | Description |
|---|---|---|
| Official MCP Servers | https://github.com/modelcontextprotocol/servers |
Collection of official MCP tools |
| Python Interpreter | https://github.com/yzfly/mcp-python-interpreter |
Execute Python code safely |
Next Steps
Ready for production? Learn how to deploy to Fly.io for a cloud-hosted instance with automatic SSL and global availability.
Pro Tip
Start with one or two MCP servers to get familiar with the system, then add more as needed. You can always enable/disable individual tools to keep your tool list organized.